Quick Tip: Create Mac OS Mojave Installer Drive
I love learning new things!
Recently, our front desk laptop at Hillbrook was bugging out, shutting itself off in the middle of a process and then showing an “international prohibition sign” (official name). #nobueno

The first time it happened, Deborah (front desk associate) brought the laptop to me with a real-life frowny face. It completely halted her workflow and it can definitely be a bit scary to see a symbol like this on a computer screen (I have to write notes to myself all the time, since I’m jumping from one thing to the next all day):

I gave her a loaner laptop and then proceeded to boot up the computer in Recovery Mode, run First Aid in Disk Utility and finally re-install Mojave. It worked…for about two weeks. Then, it happened again! ERG.
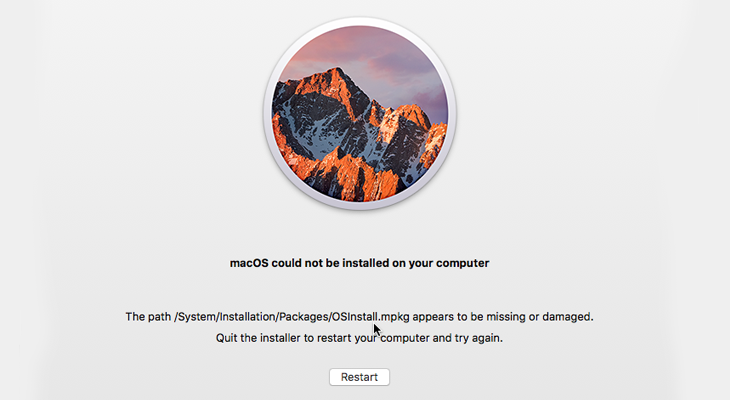
This time, re-installing the OS left me looking at a fun message on the screen: “mac OS could not be installed on your computer.” Hmm. I was at a bit of a loss. I love me a good challenge, though! #lifemantra
I did a little research and discovered that it is pretty straightforward to install a clean OS from a separate startup drive (seems obvious, right?). I had never HAD to do this in my years of experience as a technology specialist, so therefore never actually learned. It’s awesome when you are presented with a healthy challenge, stretch your mind and resources and land on solid solution ground.
Thanks to this SUPER helpful article from Apple Support, I was able to create a clean OS installer using an extra flash drive.
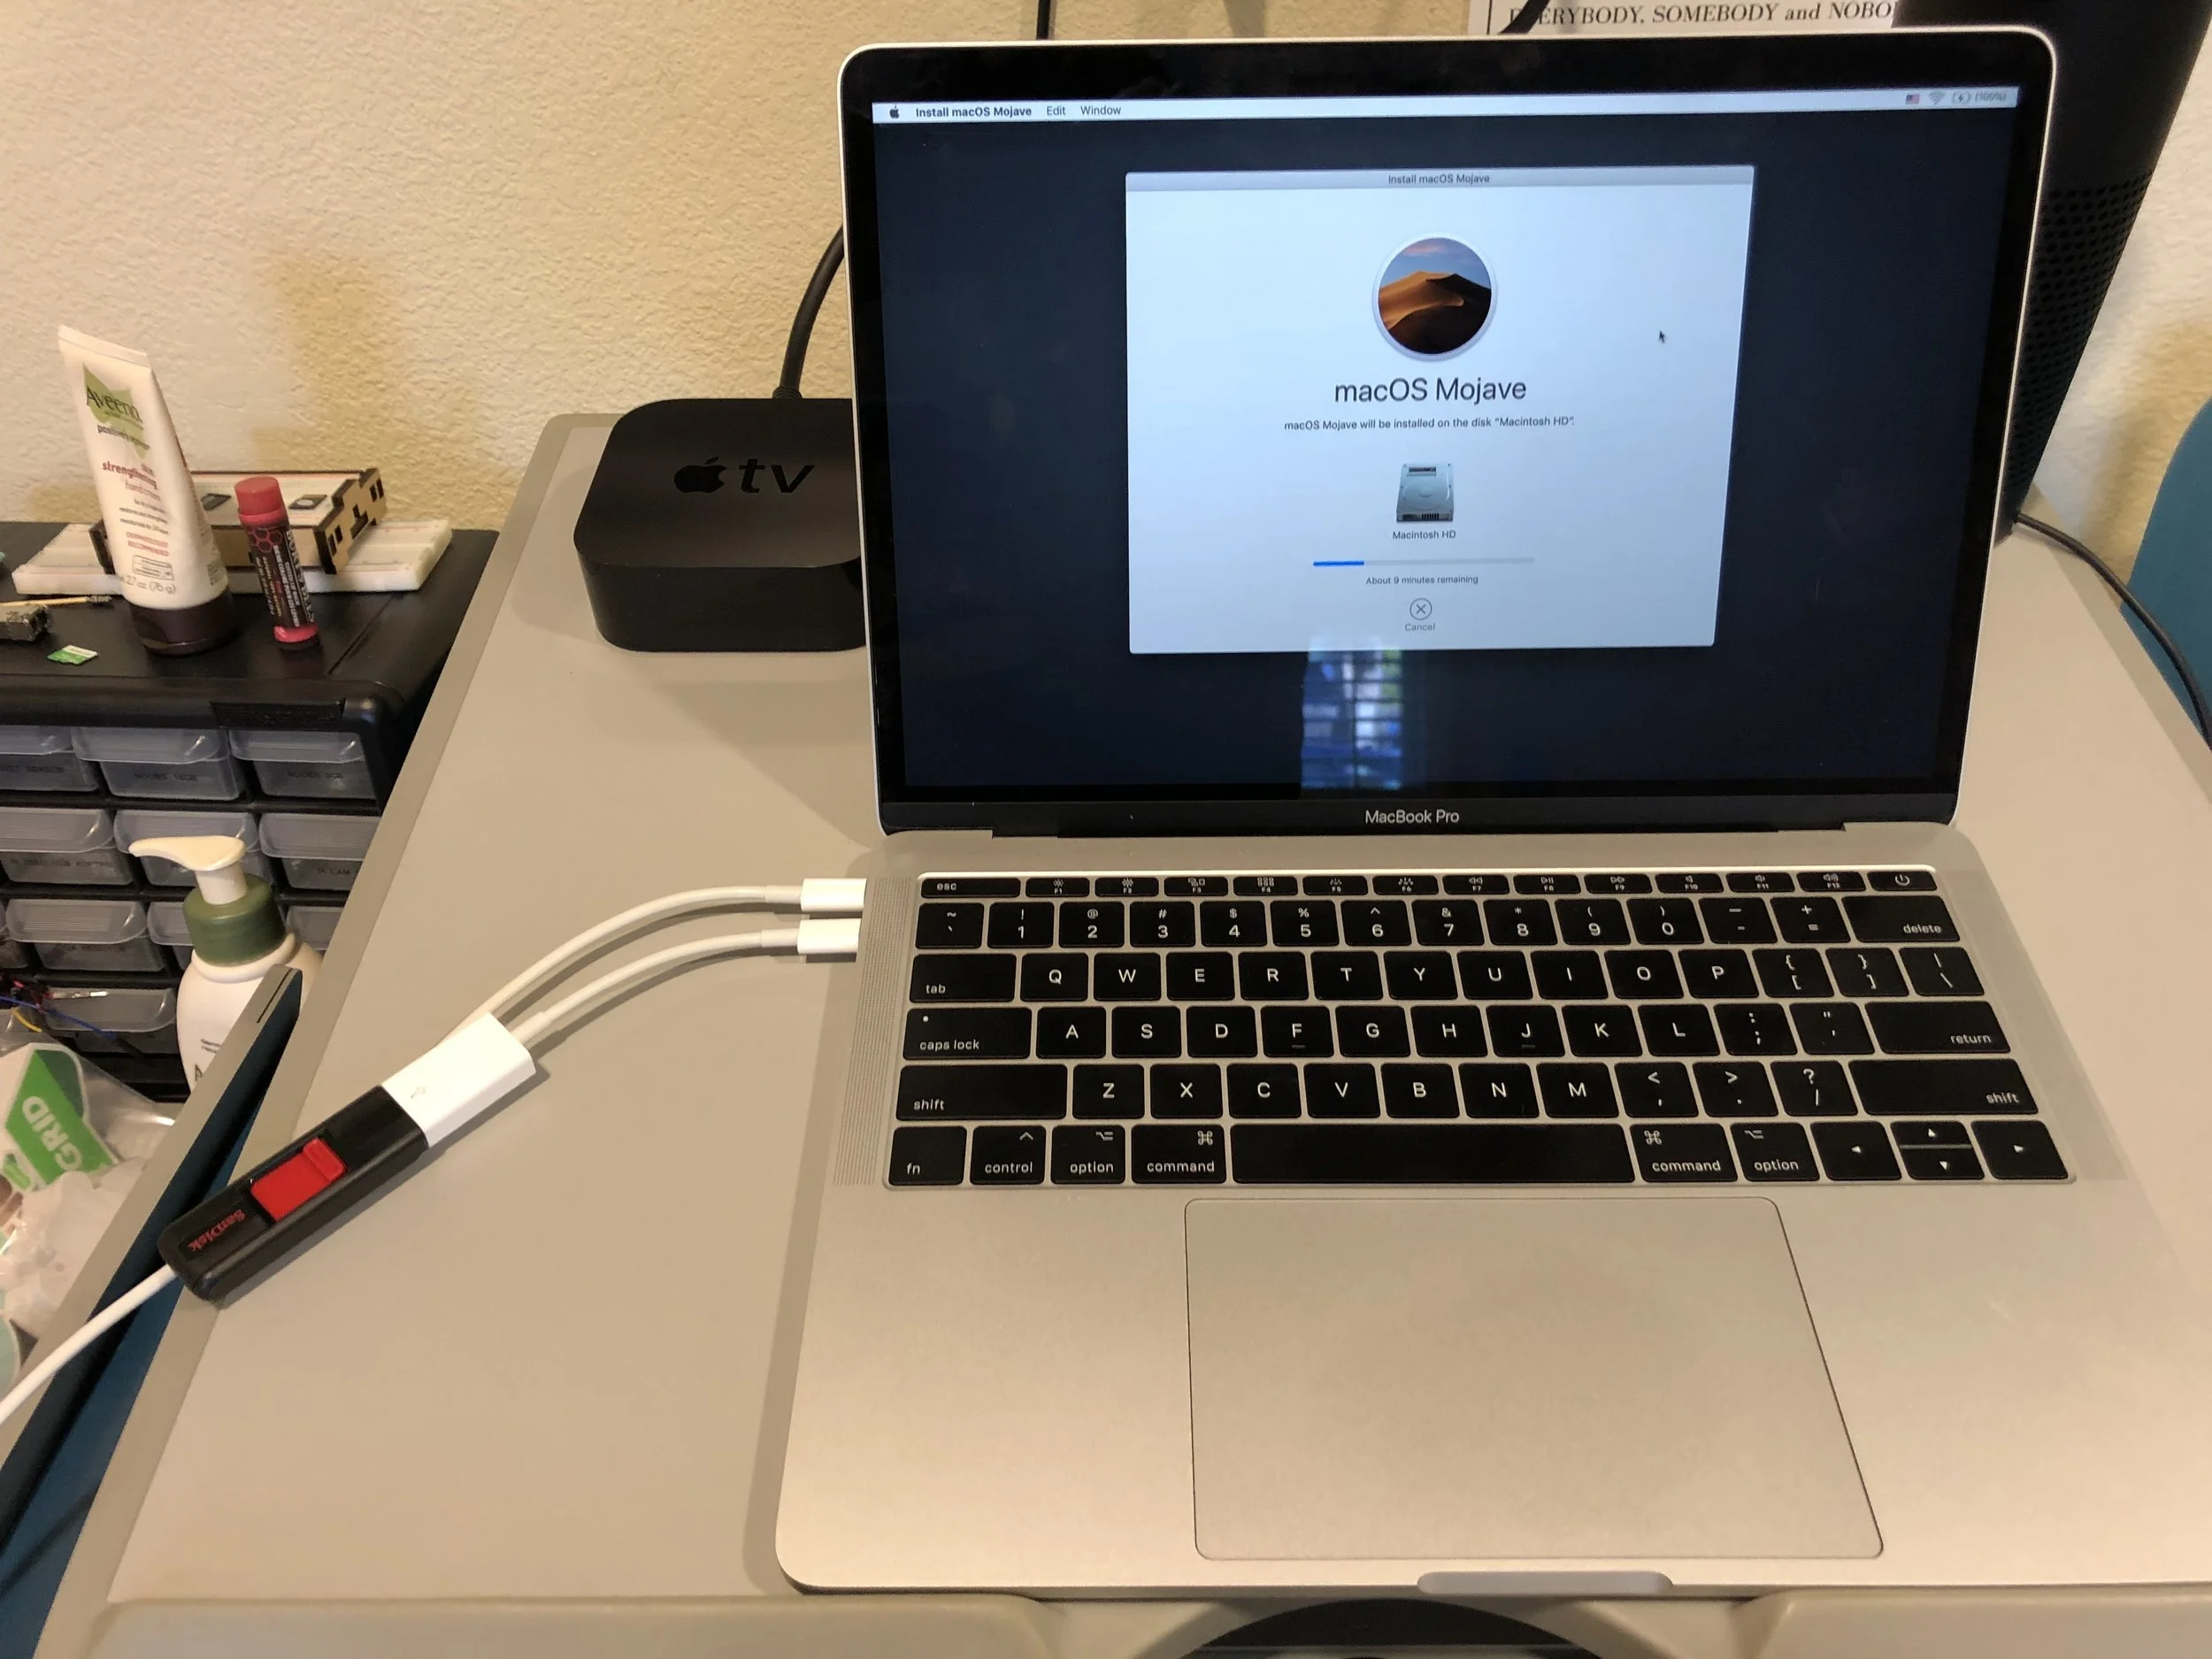

After creating the new install disk, I booted up in the disk (option + power on) and reinstalled the OS via that route. It totally worked!
A few small tips:
Make sure you have an external drive that is AT LEAST 16 GB.
Make sure the drive is formatted as Mac OS Extended (Journaled).
This article saved the day…and I am an even BETTER technology specialist for it! #newknowledge #growth